 in the toolbar, click the Document tab, click Mail Merge, then click Merge.
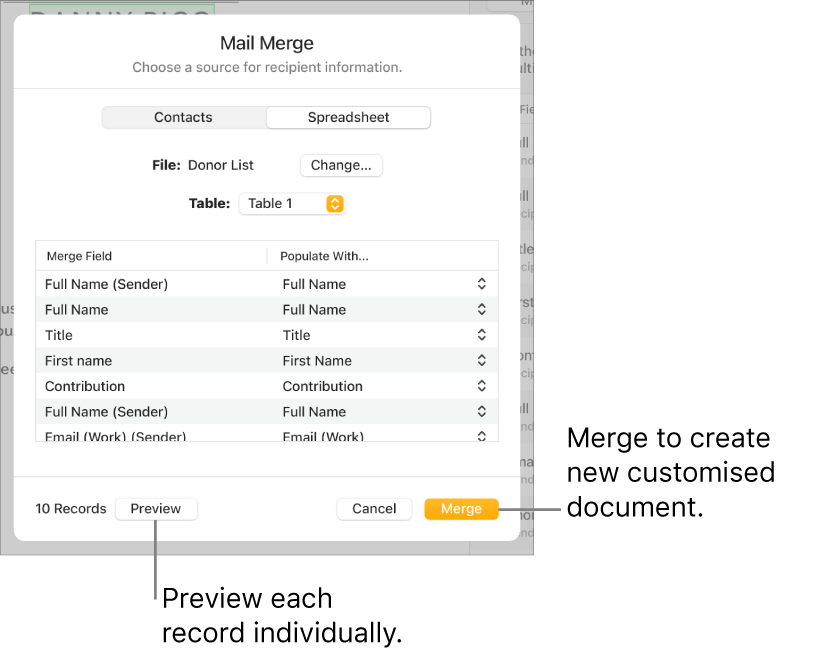

There are several ways to populate merge fields in a single document. On iPad or Mac, you can drag a Contact card over the desired merge fields. On iPhone, iPad and Mac, you can create multiple customised documents by merging information from a Contact group or Numbers spreadsheet, and preview how individual information populates before merging.
in the toolbar, click the Document tab, click Mail Merge, then click Merge.Note: You can’t change information in the preview window. If you need to make any corrections, update the related information in Contacts or the source spreadsheet.
A new document appears and contains each customised version of the document with the merge fields populated. After merging, documents only retain sender fields as merge fields.